Also see "Notifications" in the "Setup and the Admin Portal" Knowledge Base Article here.
Slack and Teams are two communication systems commonly used for inter-office communications. Setting up portal notifications to Slack and/or MS Teams allows your internal staff to be instantly notified of transactions on the portal and would allow you to render superior service to your customers.
Messages in both Slack and Teams are posted to "channels" and by adding the relevant staff to each channel will allow you to ensure relevant staff get notified when there are transactions or requests on the portal. You could of course send notifications of different types to the same channel(s) or include the same staff in more than one channel.
Setting up Slack Notifications
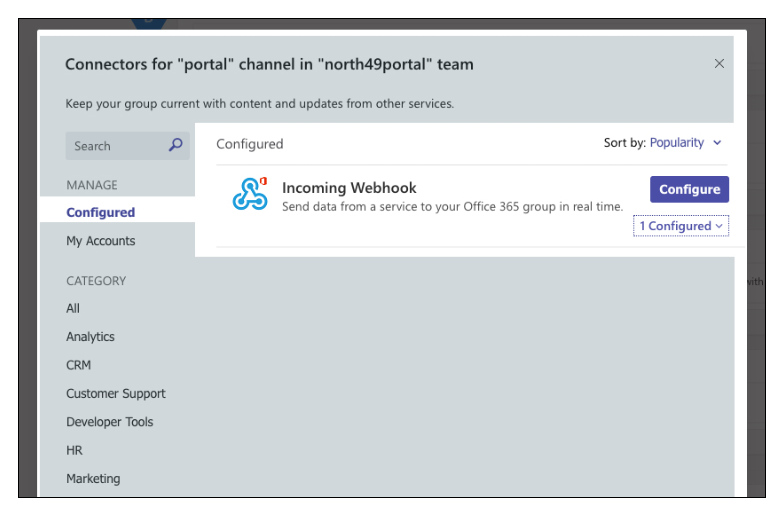
You can set up separate slack channels for different notifications. Click the "Add Slack" button in the notification section.

The following slack screen will open. If you are not signed in to your Slack account, you will first be prompted to do so.

Select the channel where you would like these notifications to post to. You need to set up the channels in Slack before this selection. When you have selected the channel, hit the "Allow" button.

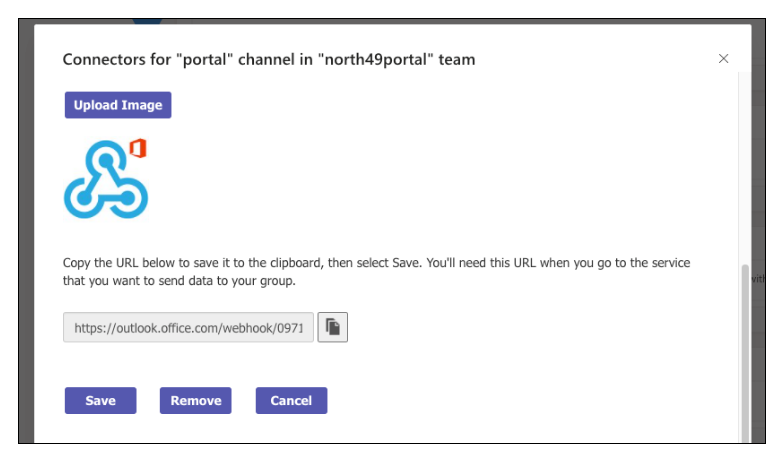
A webhook will be generated. Copy this URL and paste it into the Slack Webhook URL field on the portal Screen.

You will be notified in Slack that a new integration has been created

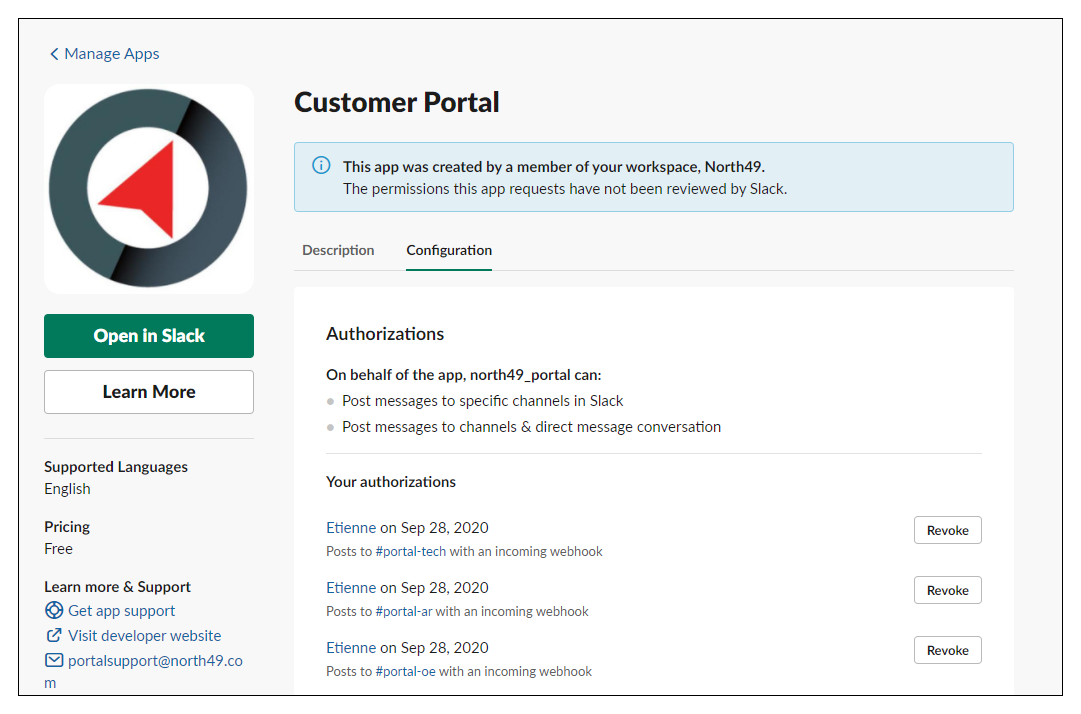
You can revoke any Portal permissions by logging in to your slack account in a browser and selecting the drop-down on your workspace name

Now select "Settings and administration" and then "Manage Apps"
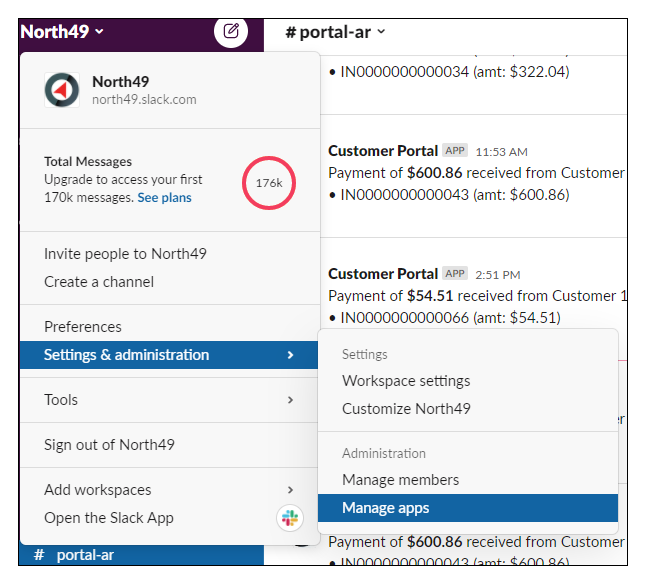
Select the "Customer Portal" from the list of apps

Select "Configuration" and revoke the permissions you want to cancel.
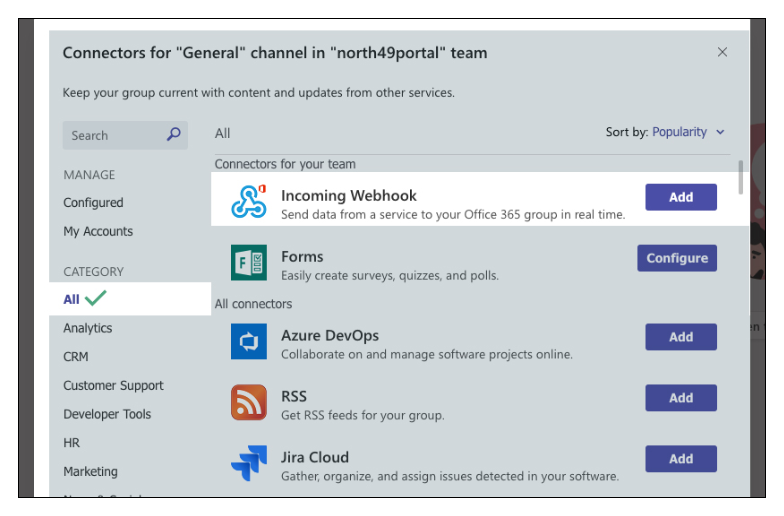
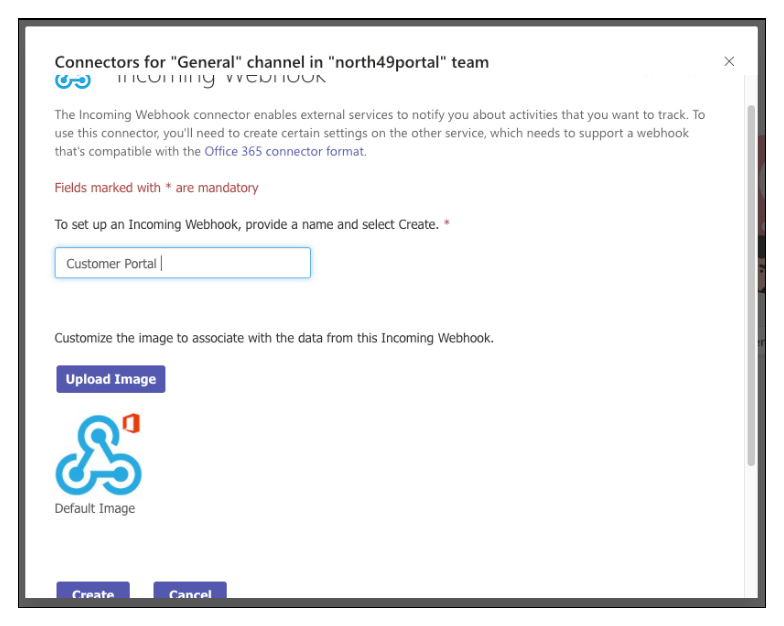
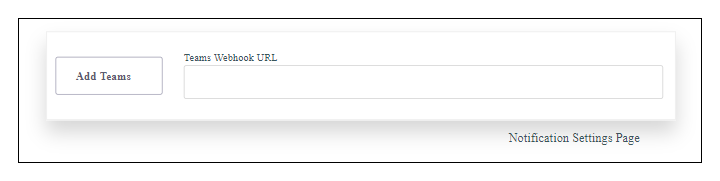
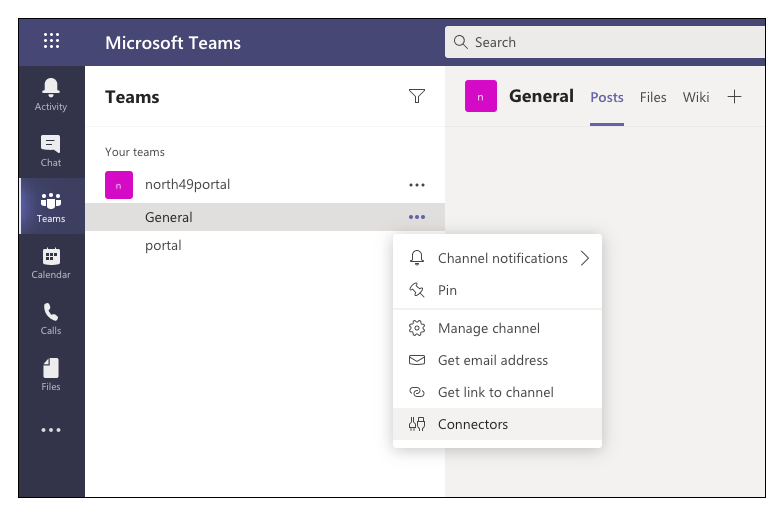
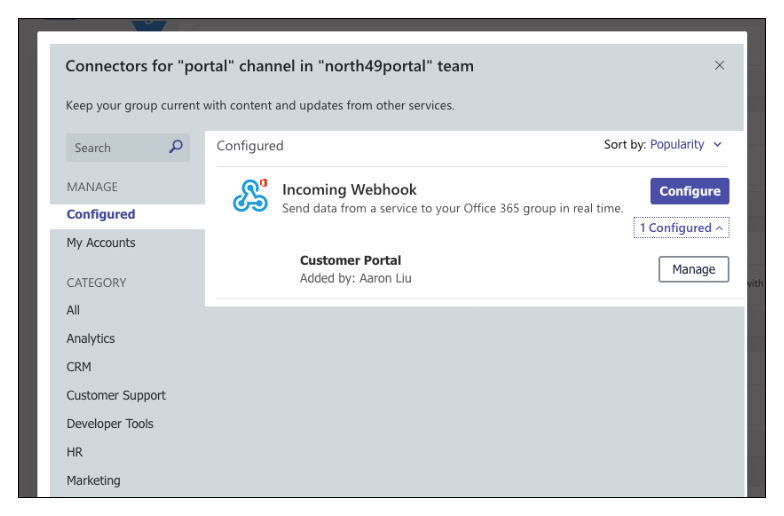
Setting up MS Teams Notifications