Sage Intacct
Enable Web Services Feature
Navigate to Company->Admin->Subscriptions

Search for Web Services and make sure it is toggled on

Add Web Services Authorizations
Navigate to Company->Setup->Company->Security

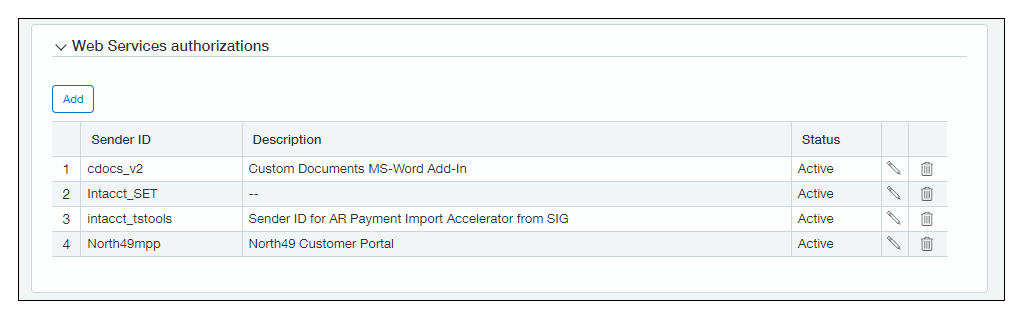
Click the Edit button on the right and scroll down to Web Services Authorization. Click the Add button and add a new one with the Sender ID “North49mpp” and make sure it is set to Active. The description is optional and you can set it to whatever works best.
Create Web Services User
Instructions vary slightly depending on whether security is “Role-Based” or “User-Based”.
Create User with Role-Based security
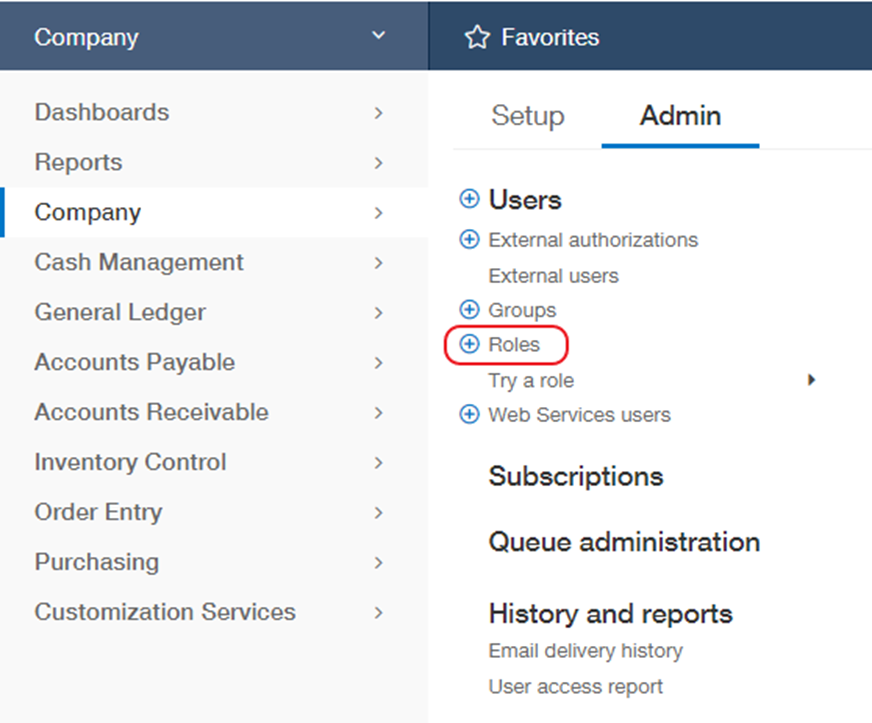
If your Intacct has Role based security, create a Role
- Company | Roles
- Click ADD
- Input a ‘Name’
- Click SAVE
- Click on the necessary Permissions for each applicable module
- Click SAVE
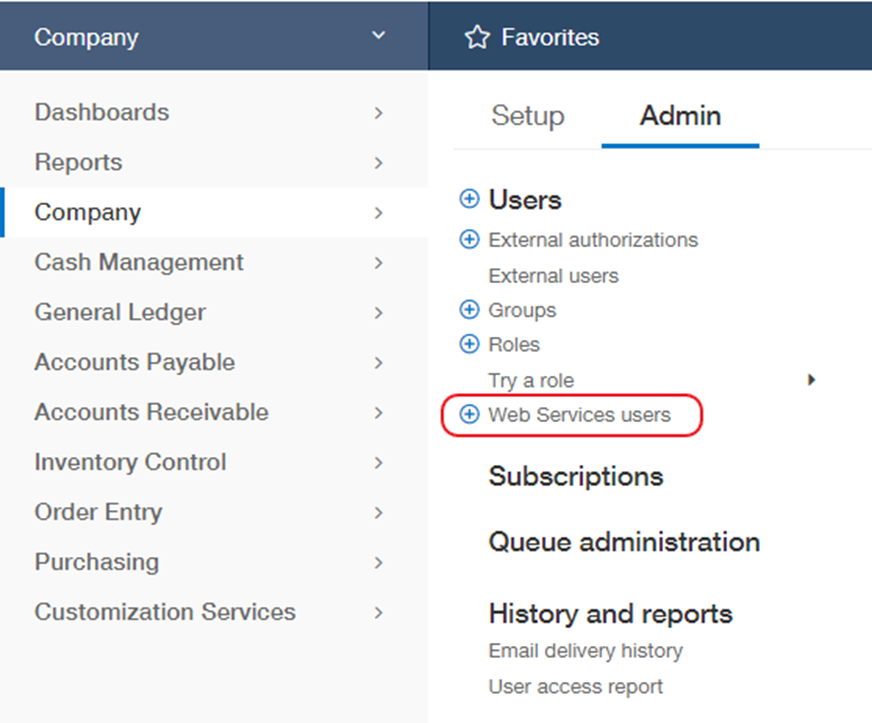
Create a Web Service User
- Company | Web Service User
- Click ADD
- Input values for these fields
- User ID
- Last name
- First name
- Email address
- Make sure the User Type = Business User
- Click on the ‘Roles information’ tab and select the Role created in the prior step.
- Click SAVE
- Ignore any warning that there will be a charge for creating the Role
Create User with User-Based security
If your Intacct has User based security, create a Web Service User.
- Company | Web Service User
- Click ADD
- Input values for these fields
- User ID
- Last name
- First name
- Email address
- Make sure the User Type = Business User
- Click SAVE
Add permissions to that new user
- Sage Intacct will return to the list of Web Service Users
- Find your Web Service User and click on SUBSCRIPTIONS
- Click on the necessary Permissions for each applicable module
- Click SAVE

Permissions
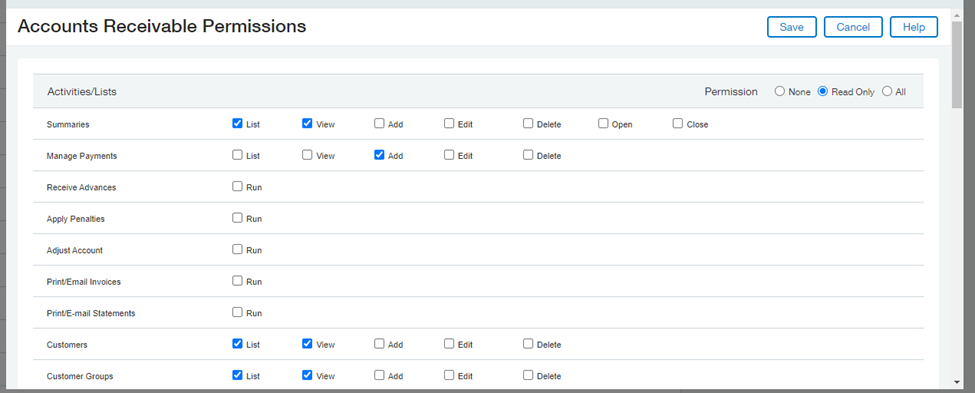
Accounts Receivables
- Check “Accounts Receivables” and click on Permissions.
- Select “Read Only” at the top right
- If the Customer Portal is also taking payments select “Add” for “Manage Payments”
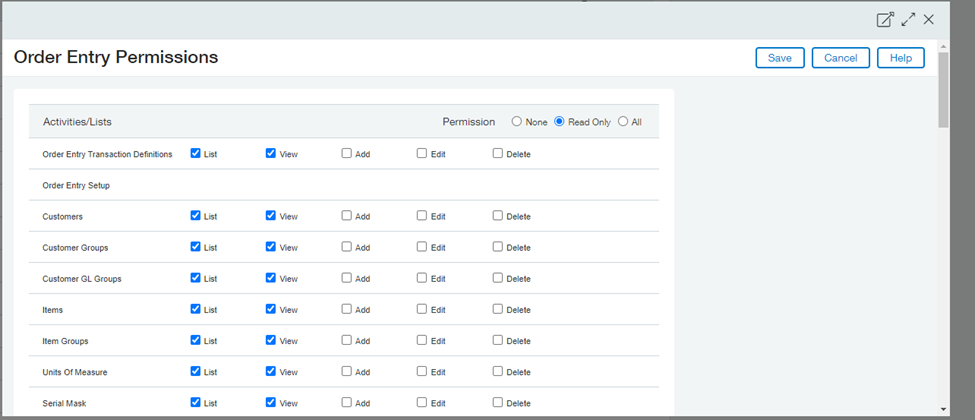
Order Entry
If the Customer Portal also display orders
- Check “Order Entry” and click on Permissions.
- Select “Read Only” at the top right
- If the Customer Portal is also inserting Orders select “Add” for “Order Entry Transactions”
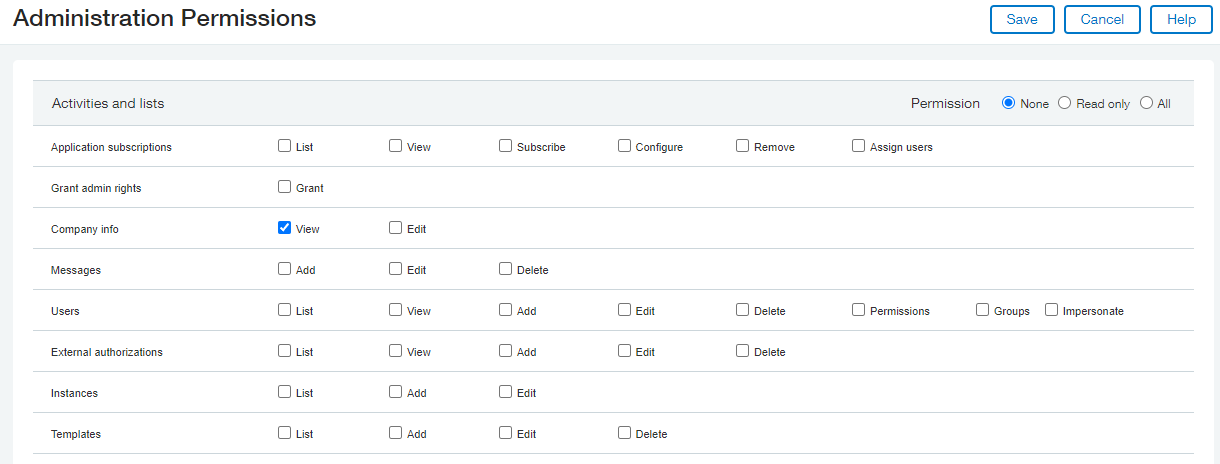
Permissions – Administration
If the Customer Portal also display orders
- Check “Administration” and click on Permissions.
- Select “None” at the top right
- Select “View” for “Company info”
Customer Portal
Intacct Setup
Log in to your Merchant account and navigate to Portal Settings->Intacct Setup
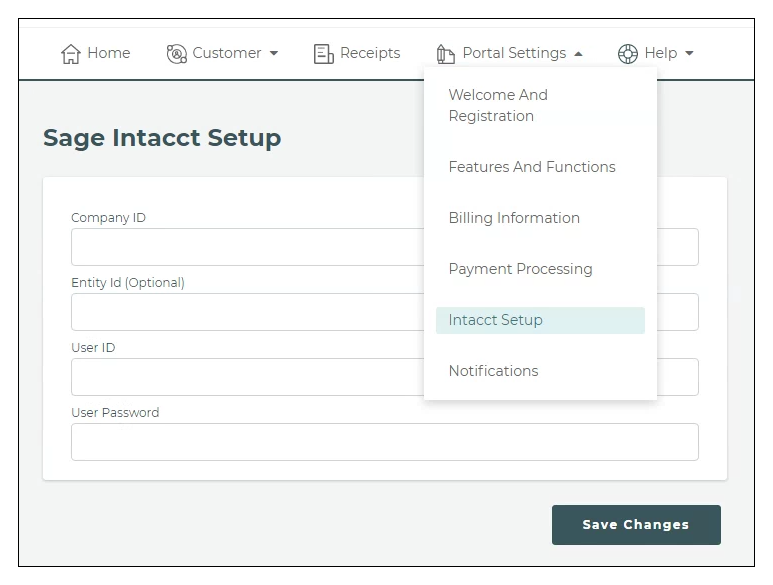
Fill in your Intacct Company Id, Entity Id (if relevant) and the user/password for the Web Services User created previously in Intacct.
Click “Save Changes”
Congratulations your Sage Intacct and Customer Portal are now linked!