The North49 Customer Portal allows two means to communicate with your customers as they log in to the portal. In this article:
Broadcast Messages
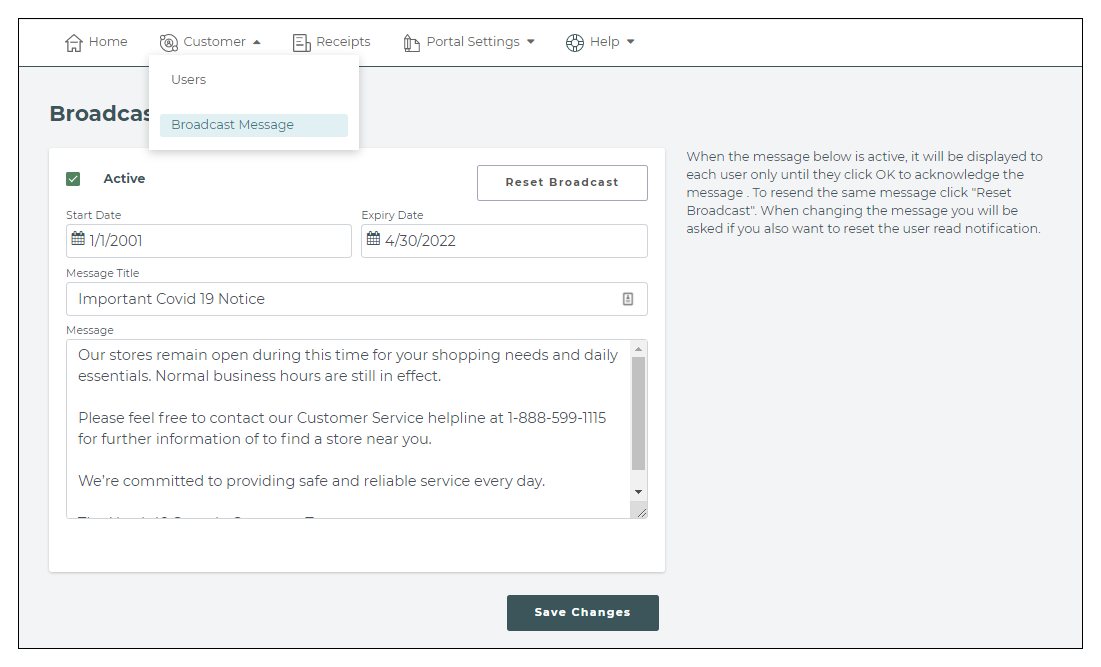
Broadcast Messages allows you to broadcast a message to all users. You must set up the message in the "Customer/Broadcast Message" screen of your admin/merchant portal. You can make a message active or inactive and set a date range for the message to be displayed. This allows you to set up a message in advance for a specific date. The portal does track when a specific user has seen and acknowledged a message and it will stop popping up for that user after the click the OK button. You can reset these indicators and let all users see the message again by hitting the "Reset Broadcast" button and the system will ask if you want to reset the message flags when you make and save any changes to the message.
You can only set up one broadcast message and the system does not keep record of the message after it has been changed or deleted. If you need to keep track of message history please do so manually.
Sage 300 - Messages to Individual Customers
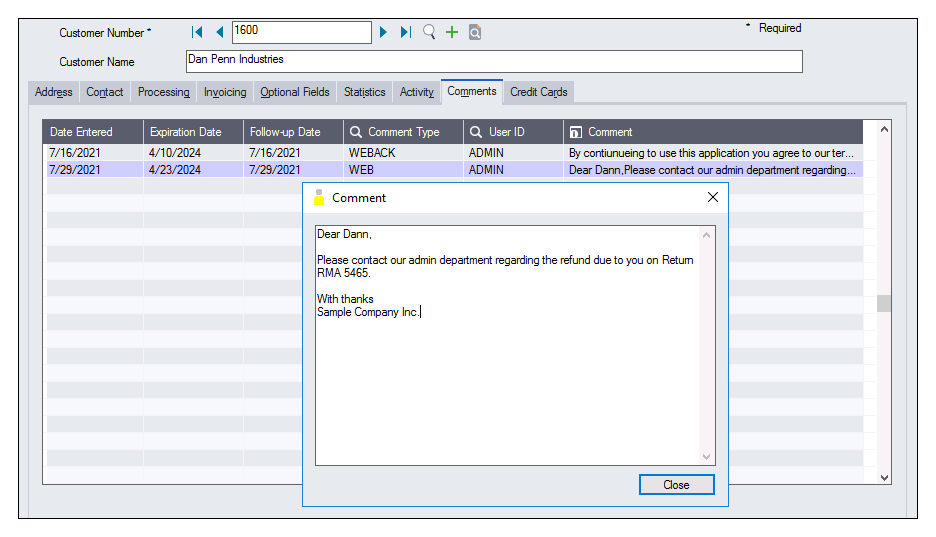
The portal allows you to send messages directly to specific customers by typing a message into the "Comments" inside your AR Customer Record in Sage 300 and setting the message "Comment Type" to "WEB". When the customer logs into the portal, the message will pop up for the user to read. Once the customer clicks the OK button the portal will set the Comment Type on the message to "WEBACK" to indicate to you that the message has been read and it will not be displayed to the customer again. If you have multiple messages to a customer they will be displayed one after the other.
You need to turn on the "Pop-up Notice" feature in your administration/merchant portal under "Portal Settings/Features and Functions".

Tip - You can use the pop-up message function to force users to agree to a user agreement by entering a brief description of the agreement in a comment with a link to a more complete agreement if necessary. You can use the Sage 300 Export/Import functionality to quickly add the message to all your customers.
Sage Intacct - Messages to Individual Customers
The portal allows you to send messages directly to specific customers by adding a message into a custom field attached to the Customer record. When the customer logs in to their account the system will check for unread messages in the field and pop it up for the customer. When the customer clicks the "OK" button, the message will be marked as read in the custom field by the Portal inserting a line ">Read by...." at the top of the message. The line will display the user who read the line as well as the date and time (in GMT standard time) that the message was read. All text below the most recent ">" character will be ignored and all text above the most recent ">" character will be displayed.
Setup
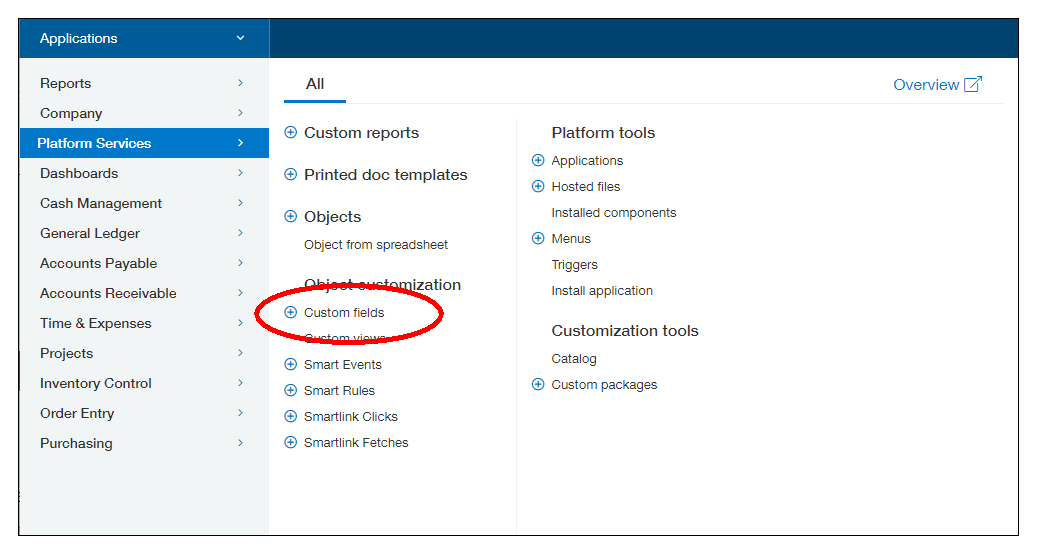
To add the field, first add the custom field in Platform Services
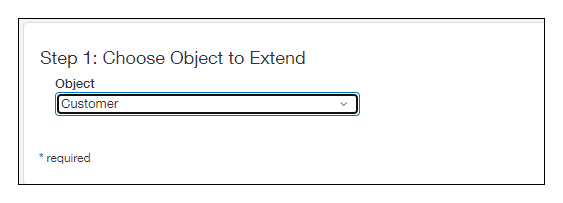
Select to extend the "Customer" Object and select "Text Area" as the data type

Next, give your field a name, number of rows to display, Field ID and description.
Note - the Field ID must be PORTAL_MSG as this will be the field that the system will be looking for.

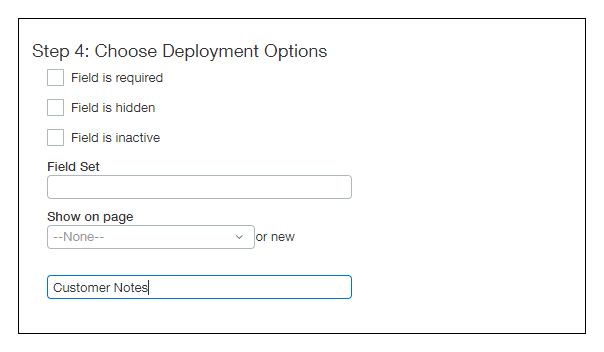
Lastly - choose how/where to deploy the field on your customer form. In this example we have added it to a new tab as the only field and left the "Field Set" blank to allow the system to display as much width as is available on the screen.
Using the new comment/note field
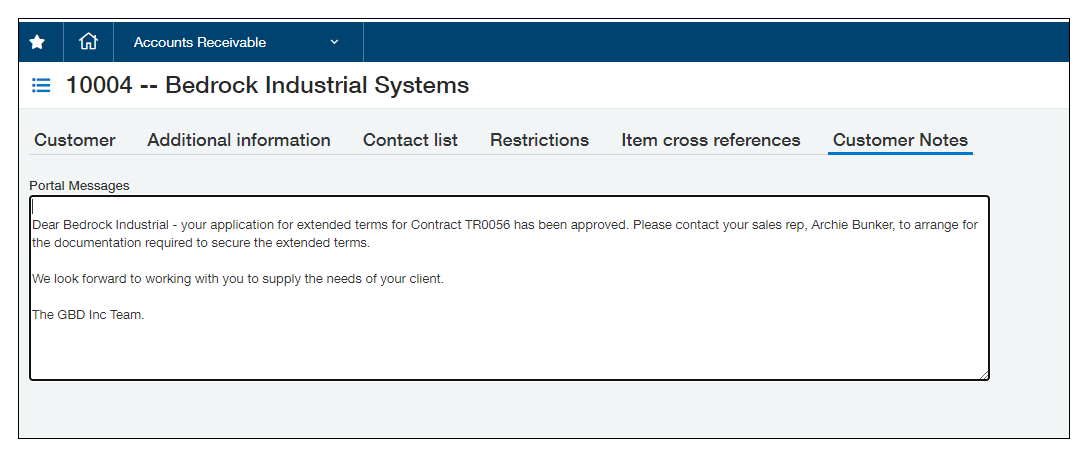
On your customer form you will now see the new note field where you have set it up - on our setup, under a new tab.
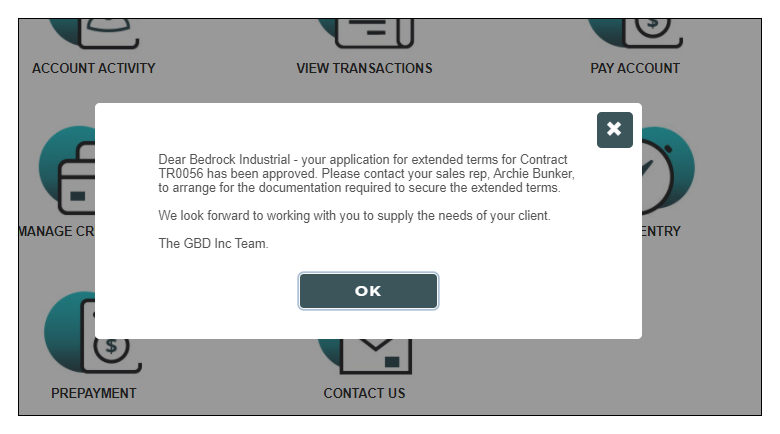
When the customer logs into the account they will get the message pop up and if the click the "OK" button the note on the customer record will be updated to show that it has been read.

You may continue to add messages at the top and the system will display any text which lies above the last ">" in the message. The following message field content will result in the message below

